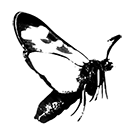
Harlequin Lady Bird.
Hi, with the amount of various camera and lens combinations people will have, there are bound to be differences between settings. These are my default setting and may be a good starting point for you.
Shutter speed 1/4000 @ F10, fixed single focus @ 25 fps and with auto iso.
I like to start with a shutter speed of 1/4000. This still won't completely stop the wings of insects such as bees, but will give decent results freezing the action. It will freeze Butterfly wings, and you could go down to 1/2500 which will gain you some light as a bonus.
An aperture of F10 will give enough depth with a chance the subject will stay in the plane of focus, depending on what direction the subject decides to take off and how close you are to the subject. You will need to shoot in very good light with these settings, and using auto ISO something like topaz de noise will help you clean the images in post processing.
Anticipating the take off is the hard part unless you have something like pre burst or pro cap, which takes out guessing when the action will start, so it's important to have a camera which has a continuous shooting mode of at least 20 fps (more the better) which will hopefully capture the subject enough times before it leaves the frame.
I use single point focus on either the subject or its perch. Its important not to follow the subject if you want to make a sequence from your images as each frame has to match the back ground if it's cluttered. The subject will be out of frame in a second or two and hopefully in that time there will be some images in focus. So keep your camera still until you finish the shot.
Editing
I load the images into photoshop as a stack so:- File > Scripts > Load files into Stack. Don't check any of the 2 options and press ok. When your images have loaded, select them all and go to Layer > Arrange > Reverse. This should put the images in the right order for you. Next hide all the images by clicking off the eye next to the layer except for the first two, and add a layer mask to all the images except the bottom one. Then in turn working up and using a black brush, paint over the mask where the subject in the image below will appear. More often then not the images will overlap and you may have to move the images slightly to fit. If you have shot with a cluttered back ground then it's difficult to match the back ground which is the reason for not moving the camera, it is much easier to shoot with a clear back ground if you can. If you have managed to get enough images you can omit the ones that overlap. When you have finished, select the top image and press Shift, Ctrl, Alt and E together to make a composite from all the layers. You can then edit your image to your own preference.
Hope this helps you a bit :)
So here is a small tutorial I have made to show how I edit my pics. Video
